How to Prep Plaster Walls for Painting
Painting old plaster walls? It's not like slapping paint on drywall. Plaster is... different . It's old-school, a bit cranky, and needs some special treatment before you even think about opening a can of paint. Here’s how to get it right.
What's This Stuff on My Walls, Anyway?
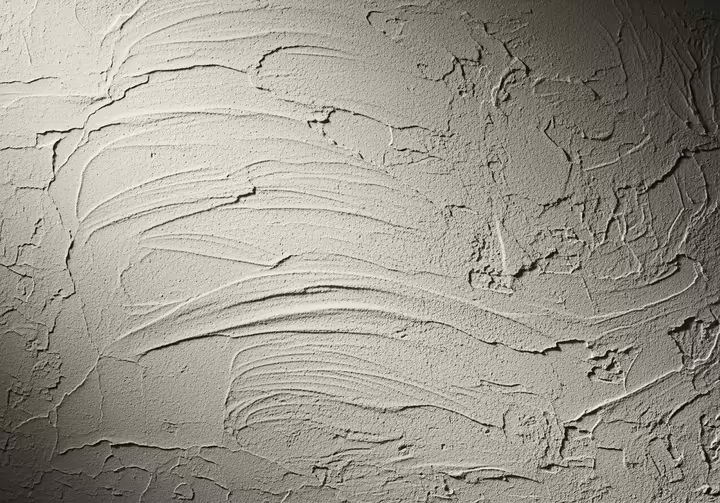
To paint plaster properly, you have to know what you're dealing with. It's not just a flat surface like drywall. It has history, a complex structure, and its own chemistry that affects how paint sticks to it.
The Old-School Method: Lath and Plaster
In houses built before the mid-1900s, walls were made with lath and plaster. First, builders nailed thin wood strips, called lath, horizontally across the wall studs, leaving small gaps between them. This wooden grid was the skeleton for the wall.
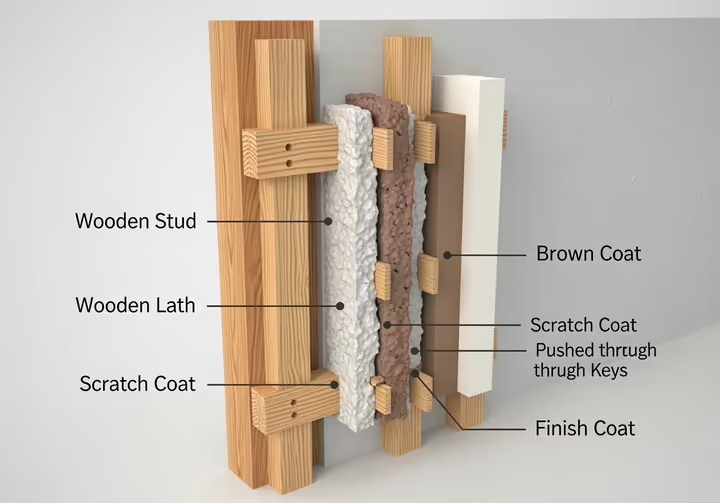
Then came the plaster, applied in three thick coats. The first layer, the scratch coat , was pushed hard into the gaps between the lath. The plaster would ooze through the back and slump over, creating keys that hardened and locked the whole wall to the wooden frame.
A second brown coat added thickness, and a final finish coat made it smooth. This solid construction makes old plaster walls great at blocking sound and slowing the spread of fire, which is why they're worth saving.
The New(ish) Way: Drywall and Skim Coats
By the mid-20th century, pre-made gypsum board (drywall) took over because it was much cheaper and faster to install. This led to a couple of modern plastering methods you might find in your home.
One method is veneer plaster , which is a very thin layer of special plaster spread over a specific type of drywall. It gives you the hard, durable surface of plaster with the speed of a drywall installation.
More common in renovations is a skim coat . This is just a super-thin layer of joint compound smoothed over an existing wall (either old plaster or drywall) to hide small flaws and create a fresh surface for paint.
Why New Plaster is Thirsty and Mad
Fresh plaster or a new skim coat is a chemically active surface that's still curing. This curing process isn't just about drying, it's a chemical reaction. A key byproduct is calcium hydroxide, which makes the surface extremely alkaline (a pH of 13 or higher).
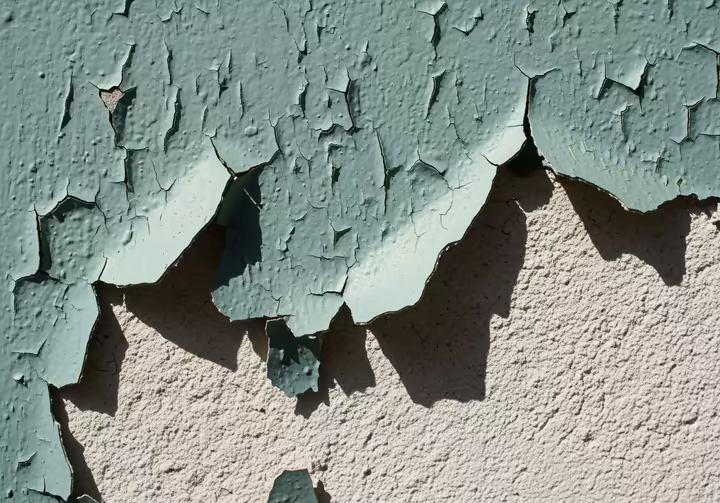
This high alkalinity is bad news for certain paints. If you put oil-based paint on a fresh, alkaline plaster wall, a reaction called saponification occurs. The alkali attacks the oils in the paint, basically turning it into soap right on your wall, which causes the paint to fail and peel off.
At the same time, new plaster is incredibly porous, like a dry sponge. If you apply a standard coat of paint, the plaster will suck the water out of it too fast. This stops the paint from forming a strong film, leading to cracking, flaking, and peeling.
Playing Doctor: Check Your Walls
Before you do anything else, you have to inspect your walls. Plaster can tell you a lot about a building's history, and cracks or stains are often symptoms of bigger problems. Just covering them up is a temporary fix, the problems will just come back.
Look and Feel
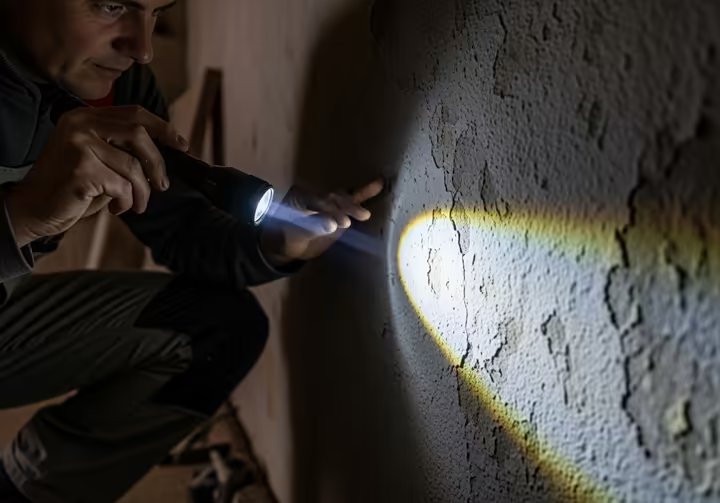
Carefully check every square foot of the wall. Look for obvious things like peeling paint, cracks, and stains. Then, run your hand over the surface to feel for subtle bulges, soft spots, or areas where the plaster feels sandy and crumbles to the touch.
What's That Crack?
Not all cracks are a big deal, but some are. Hairline cracks (less than 1/8 inch wide) are usually just from the house settling or changing with temperature and humidity. They need to be fixed for a smooth finish, but they aren't an emergency.
Bigger cracks are red flags. Cracks wider than 1/8 of an inch, especially if they're growing, are a concern. Diagonal cracks running from the corners of windows and doors or "stair-step" cracks that follow mortar lines often point to foundation problems. If you see these, call a structural engineer before you do any cosmetic repairs.
Hollow Sounds and Crumbly Bits
Give your wall a gentle tap with your knuckles. A solid, dull thud is good, it means the plaster is attached to the lath. A hollow, drum-like sound means the plaster has delaminated, the keys have broken off, and it's no longer bonded to the wall structure.
Also look for "punky" or crumbling plaster. If the plaster turns to a fine powder when you touch it, the original mix was bad or it has suffered long-term water damage. This stuff has no strength and must be removed until you reach a solid edge.
Spotting Water Damage
Brownish stains are the clearest sign of a water leak. You must find the source of the water, a bad roof, leaky pipe, etc., and fix it permanently before touching the plaster.
Efflorescence is a white, crystalline powder that can appear on the surface. This isn't mold, it's salt left behind as water evaporates from the wall, and it's a sure sign of a moisture problem. You can confirm it's efflorescence by touching it with a wet cotton swab, the salty powder will dissolve.
What Kind of Paint is Already There?
You need to know what kind of paint is on the walls. Putting modern latex (water-based) paint over old oil-based paint without the right prep will cause peeling.
Here's a simple test. Wet a cotton ball with denatured alcohol or acetone-based nail polish remover and rub a small spot on the wall. If paint color comes off onto the cotton ball, it's latex-based. If the cotton ball stays clean, it's oil-based.
Time to Clean Up
After your inspection, it's time to clean. Don't skip this. Paint needs a clean surface to stick to, any dust, grime, or grease will act as a barrier and prevent a good bond.
Everyday Dirt and Grime
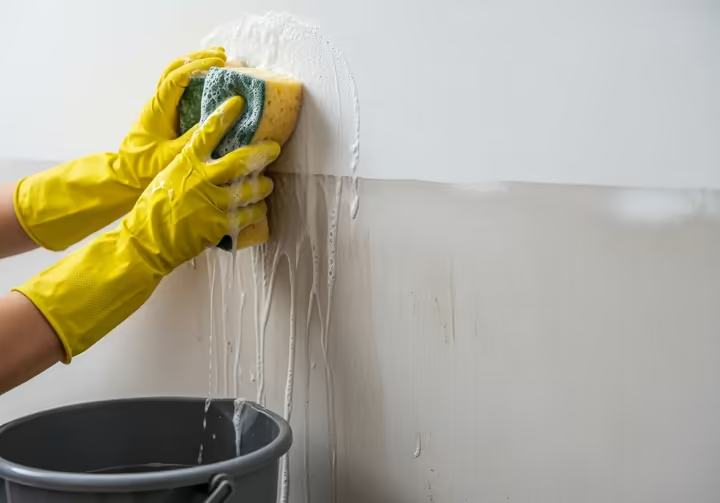
For typical household dust, you'll need a strong detergent wash. Sugar soap or Trisodium Phosphate (TSP), or a phosphate-free substitute, work great. These alkaline cleaners cut through dirt and can slightly dull glossy surfaces, which helps the new paint adhere better.
Mix the cleaner with warm water and apply it with a large sponge, working from the bottom of the wall upwards. This seems weird, but it prevents clean streaks from running down and staining the dirtier lower sections. If you want to avoid harsh chemicals, a mix of vinegar and water can work for lightly soiled walls.
The Really Nasty Stuff: Nicotine, Soot, and Grease
Kitchen walls or walls from a smoker's home are tougher. Grease, nicotine, and soot are oily and will bleed right through new paint if they aren't dealt with properly.
First, remove any dry stuff before you get the wall wet. Use a "dry cleaning sponge" (also called a soot sponge). This special rubber sponge lifts away loose particles without smearing them. After you've removed the loose gunk, wash the wall with a strong TSP solution to get rid of the remaining oily film.
Rinse and Dry (Don't Skip This!)
After washing, you have to rinse all the cleaner off with a bucket of clean water and a clean sponge. Any leftover cleaning residue is just another layer of contamination that will mess with your primer.
Then, let the plaster dry completely. This can take 24 hours or more, so be patient. Painting on a damp wall traps moisture, which will cause the paint to blister and peel later on.
Patching Things Up
Once the walls are clean and dry, it's time to repair the damage. The goal is to create a patch that blends in perfectly and is strong enough to last.
Fixing Hairline Cracks
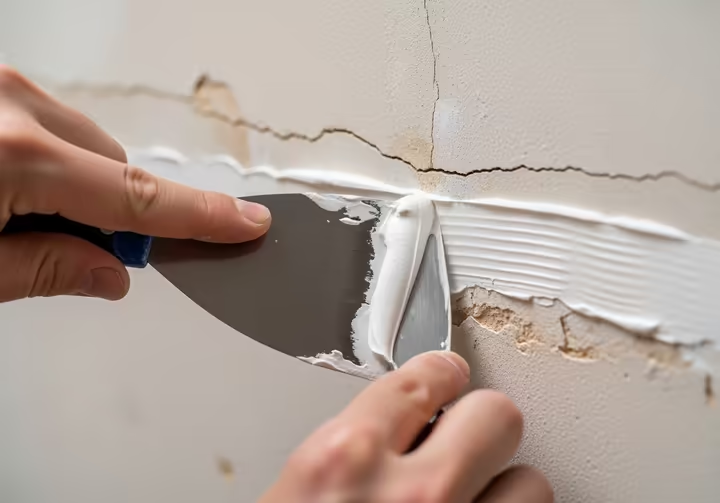
This sounds counterintuitive, but to fix a hairline crack, you first have to make it bigger. Use a utility knife to carefully rake out the crack into a V-shaped groove. This gives the filler enough depth and surface area to get a good grip, locking the repair in place so the crack doesn't come back.
Once the groove is clean, press a fine surface filler or a flexible, paintable caulk into the channel and smooth it flush with the wall.
Dealing with Bigger Holes
For larger holes, start by removing all the loose, crumbling plaster around the edges until you hit solid material. For the strongest patch, "undercut" the edges of the existing plaster by carving them at a slight inward angle. This creates a dovetail shape that mechanically locks the new patch in place, making it impossible for it to fall out.
For the filling material, use a setting-type compound (sold as a powder, like Durabond) instead of pre-mixed joint compound. Setting-type compounds harden through a chemical reaction, making them much harder and less prone to shrinkage. Build the repair in layers, pushing the first coat firmly into the lath to create new "keys" that anchor the patch.
Strengthening Crumbly Plaster
If your plaster is soft and chalky but not missing, you need to stabilize it. After scraping away all the loose material, apply a plaster stabilizer or conditioner to the exposed edges. This thin liquid soaks into the porous substrate and binds the loose particles together, creating a solid foundation for your new patch.
Fixing Water Damage (In the Right Order)
Repairing water damage has a strict order. First, fix the source of the leak and let the wall dry out completely. Then, scrape away all the damaged plaster down to a solid surface.
Here's the most important step: before you apply any patch, seal the stained area and the raw plaster edges with a high-quality, solvent-based (shellac or oil) stain-blocking primer. This both locks in the stain so it can't bleed through and seals the porous plaster so it doesn't suck the moisture out of your patch. Only after the primer is dry can you start filling the hole.
Getting it Smooth: Sanding
After your patches are fully cured, it's time to sand them smooth. Sanding blends the repairs seamlessly with the rest of the wall. But be warned, it creates a ton of fine dust.
Sanding Tools
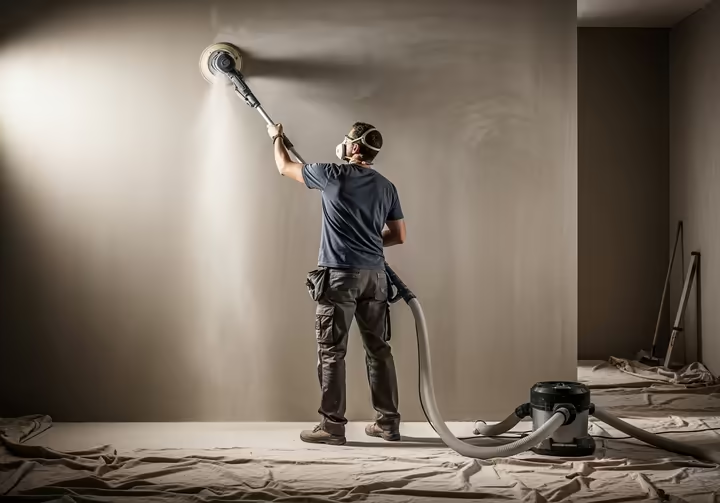
For small patches, a hand-sanding block or a flexible sanding sponge will do the trick. For larger repairs or a full skim coat, use a pole sander. This tool lets you sand large areas from the floor with even pressure, giving you a much flatter, more professional finish.
Picking Your Paper
Sandpaper is graded by its "grit" number, a lower number is coarser, a higher number is finer. Start with a medium-grit paper (100- to 120-grit) to quickly knock down any high spots and shape the patch. Then, do a final pass with a fine-grit paper (150- to 220-grit) to erase any scratches and leave a perfectly smooth surface.
Managing the Mess (and Staying Safe)
Plaster and joint compound dust is incredibly fine, gets everywhere, and is bad for your lungs. The most basic way to control it is to seal off the room with plastic sheeting over doorways and vents.
A cleaner method is wet sanding, where you use a special damp sponge to smooth the compound instead of abrading it. It's virtually dust-free, but it's slow and can be tricky to get a perfectly flat surface.
The best method is to use a power sander connected to a shop vacuum with a HEPA filter. The vacuum sucks up the dust right at the source, giving you the speed of dry sanding without the massive mess. It's the best choice for both your health and your house.
The Magic of Primer
With the wall finally clean, repaired, and smooth, you've reached the most critical chemical step: priming. For plaster, priming is not optional. You absolutely must use a separate primer, those "paint-and-primer-in-one" products won't cut it here.
Why You Can't Skip Primer
A primer is engineered to solve plaster's two main problems. It seals the porous surface so it doesn't suck the life out of your paint, and it creates a barrier to protect the paint from the wall's high alkalinity. Applying paint directly to bare plaster or a new patch will lead to failure, guaranteed.
Priming Fresh Plaster: The Mist Coat
For a brand new plaster wall or a fresh skim coat, you need to apply a "mist coat." This isn't a special product, you make it yourself by thinning a standard water-based matt emulsion paint with clean water. A good ratio is about four parts paint to one part water.
A word of warning, never use PVA glue to seal plaster before painting. It creates a film that paint can't properly bond to, which causes widespread peeling down the road.
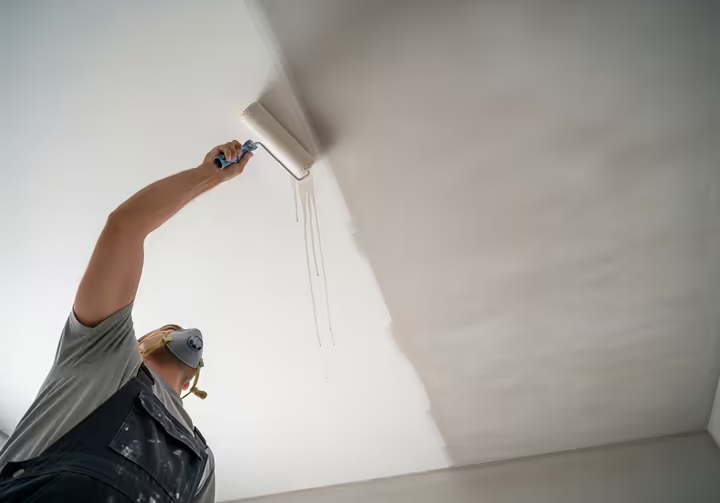
The thin, watery mist coat soaks deep into the plaster, satisfying its intense "thirst" and creating a strong bond within the wall itself. It also forms a barrier that protects your topcoats from chemical attack. Without it, your paint will crack, flake, and peel right off.
Priming Patches and Painted Walls
If you've just repaired a few spots on an already painted wall, you must spot-prime those patches. If you don't, the porous patches will absorb the topcoat differently than the rest of the wall, leaving a blotchy finish called "flashing."
Special Primers for Special Problems
Sometimes, you need a specialized primer to solve a specific problem.
- Shellac-Based Primers: These are the big guns. They'll block the most stubborn stains like severe water damage, heavy nicotine, and smoke. They dry fast but have a strong odor.
- Oil-Based Primers: Excellent all-around stain blockers for moderate water stains, graffiti, and discoloration. They are very durable but also have a strong smell.
- Water-Based Primers: Easy to use, low odor, and good for blocking minor stains like crayon or scuff marks.
Bonding Primers are designed to stick to slick, glossy surfaces. Their most important job on a plaster wall is preparing an old, oil-based paint surface for a new coat of latex paint. The bonding primer acts like a glue, giving the new paint something to grab onto.
| Surface Problem | Recommended Primer | Why you need it |
|---|---|---|
| New Bare Plaster or Skim Coat | Water-Based Emulsion Mist Coat | Seals the super-porous surface and protects the topcoat from the plaster's high alkalinity. |
| Severe Water, Nicotine, or Smoke Stains | Shellac-Based Stain Blocker | Creates a permanent, bulletproof barrier that locks in the absolute worst stains and odors. |
| Moderate Stains, Graffiti | Oil-Based Stain Blocker | Effectively seals a wide range of common stains and provides excellent durability. |
| Old, Glossy Oil-Based Paint | Adhesion / Bonding Primer | Chemically grips the slick, non-porous surface to give your new latex topcoat a solid foundation. |
| Sanded Plaster Patches | Quality Latex or Oil-Based Primer | Seals the porous patch so it absorbs paint at the same rate as the rest of the wall, preventing a blotchy finish. |
| Minor Scuffs or Light Stains | Water-Based Stain Blocker | Covers up small cosmetic issues with easy, low-odor, soap-and-water cleanup. |
Safety First (No, Really)
Prepping plaster walls involves dust and chemicals, so you need a plan to stay safe. This isn't just about wearing gear, it's about planning your work to minimize the hazards in the first place.
Gear Up: Your PPE Checklist

- Respiratory Protection: This is the most important piece of gear. Dust from sanding plaster can contain silica. A simple paper mask is useless, you need a NIOSH-approved respirator. An N95 is the minimum, but a P100 is even better, especially for a lot of sanding.
- Eye Protection: Wear safety glasses or, even better, sealed goggles to protect your eyes from dust, debris, and chemical splashes.
- Hand and Skin Protection: Wear chemical-resistant gloves when using cleaners like TSP or solvent-based primers. Long sleeves and pants will protect your skin from irritating dust and chemicals.
The Lead Paint Problem
If your house was built before 1978, you must assume the walls have layers of lead-based paint. Lead is a dangerous neurotoxin, and sanding or scraping it creates hazardous dust. This is especially risky for children and pregnant women.
You can use an EPA-recognized lead test kit to check. If lead is present, you must use lead-safe work practices. This means fully containing the area with plastic, using wet methods (like misting surfaces with water before scraping) to keep dust down, and cleaning up meticulously with a HEPA-filtered vacuum.
Breathe Easy: Ventilation
You need good ventilation when using any chemical. Solvent-based primers, like oil and shellac types, release volatile organic compounds (VOCs) that are harmful in an enclosed space. Open windows and use fans to create a cross-breeze that pulls the fumes outside.
Works cited
- Should you keep lath and plaster or replace with modern ..., https://adaptavate.com/news/lath-and-plaster-vs-board-and-skim
- Your Selection Guide to Conventional and Veneer Plaster, https://www.nationalgypsum.com/ngconnects/blog/building-knowledge/choose-the-right-plaster
- Should I skim coat the old plaster or put on new drywall? - Houzz, https://www.houzz.com/discussions/2469781/should-i-skim-coat-the-old-plaster-or-put-on-new-drywall
- Woemmel Plastering Points Out the Differences Between Plastering and Skimming, https://woemmelplastering.com/2023/08/22/woemmel-plastering-points-out-the-differences-between-plastering-and-skimming/
- Skim Coat vs. Plaster: Learn Their Differences - Island Paints, https://islandpaints.com/home-decorating-tips/skim-coat-vs-plaster-learn-their-differences/
- Painting New Plaster - Zinsser, https://zinsseruk.com/how-to-guides/painting-bare-plaster
- How Long Before Painting New Plaster - Fantastic Services UK Blog, https://blog.fantasticservices.com/how-long-before-painting-new-plaster/
- Protect Pool Plaster with LSI Balance from the Start - Blog - Orenda Technologies, https://blog.orendatech.com/pool-startup-protect-new-plaster
- Plastering Technical Guide — Preparation for Painting (English) - PM15 - USG, https://www.usg.com/content/dam/USG_Marketing_Communications/united_states/product_promotional_materials/finished_assets/plastering-technical-guide-preparation-for-painting-en-PM15.pdf
- Paint Delamination: Causes And Fixes For When Paint Fails - John Canning & Co., https://johncanningco.com/blog/causes-and-remedies-of-paint-delamination/
- How to Fix Paint Adhesion Loss - Dulux Trade, https://www.duluxtrade.com.au/technical-advice/performance/paint-adhesion-loss/
- Painting Plaster with Acrylics - Just Paint, https://justpaint.org/painting-plaster-with-acrylics-2/
- The ONLY Way To Paint New Plaster | Step by Step Guide - Little House On The Corner, https://www.littlehouseonthecorner.com/how-to-paint-new-plaster/
- How to Paint on Fresh Plaster: Expert Tips for Perfect Results ..., https://coatpaints.com/blogs/how-to-paint/how-to-paint-on-new-plaster
- How To: Diagnose Common Plaster Problems Plaster -The Craftsman Blog, https://thecraftsmanblog.com/how-to-diagnose-plaster-problems/comment-page-2/
- How To: Diagnose Common Plaster Problems Plaster -The ..., https://thecraftsmanblog.com/how-to-diagnose-plaster-problems/comment-page-1/
- Identifying Structural Cracks and Non-Structural Cracks - Crack X, https://crackx.com/identifying-structural-cracks/
- Plaster Stabilization: When and Why It's Necessary to Repair Plaster - John Canning & Co., https://johncanningco.com/blog/plaster-stabilization/
- Complete Guide to Painting Plaster Walls | Experienced Painters, https://pizzazzpainting.com/blog/plaster-wall-guide/
- 10 Tips for Painting Plaster Walls | Family Handyman, https://www.familyhandyman.com/article/tips-for-painting-plaster-walls/
- Cracked Walls 101: Types, Causes, and Fixes - Epp Foundation Repair, https://eppconcrete.com/cracked-walls-types-causes-fixes/
- Foundation Cracks: What Is Normal and When to Worry - This Old House, https://www.thisoldhouse.com/foundations/foundation-cracks
- When To Worry About Cracks in Plaster Walls - AB Drylining, https://abdrylining.com/cracks-in-walls/
- How To Fix A Hairline Crack On A Plaster Wall So It Doesn't Come ..., https://www.melanielissackinteriors.com/blog/2023/6/14/how-to-fix-a-hairline-crack-on-a-plaster-wall-so-it-doesnt-come-back
- Understanding Structural Cracks: Identification, Types and Causes - Go Report, https://goreport.com/understanding-structural-cracks/
- Structural Wall Cracks vs. Non-Structural Wall Cracks: An Easy Guide - Ohio Basement Authority, https://www.ohiobasementauthority.com/resources/foundation-repair/difference-between-structural-cracks-and-non-structural-foundation-cracks/
- Fixing crumbling plaster, filler or plaster skim? - Screwfix Community Forum, https://community.screwfix.com/threads/fixing-crumbling-plaster-filler-or-plaster-skim.213213/
- Plaster Defects: Why They Happen And How to Diagnose Them - John Canning & Co., https://johncanningco.com/blog/common-plaster-defects-from-workmanship/
- Painting Plaster Walls in 5 Easy Steps | Brad the Painter, https://www.bradthepainter.com/painting-plaster-walls/
- Removing Efflorescence From Plaster - GSA, https://www.gsa.gov/real-estate/historic-preservation/historic-preservation-policy-tools/preservation-tools-resources/technical-procedures/removing-efflorescence-from-plaster
- What Is Efflorescence and How to Remove It - Nitterhouse Masonry Products, https://www.nitterhousemasonry.com/blog/what-is-efflorescence/
- Efflorescence on plaster bathroom wall? - Home Inspection, http://www.inspectionnews.net/home_inspection/introductions-by-new-members/35722-efflorescence-plaster-bathroom-wall.html
- How to Tell If Its Oil or Latex Paint - Nix Sensor, https://www.nixsensor.com/how-to-tell-if-its-oil-or-latex-paint/
- How to Determine if Your Walls Have Latex or Oil-Based Paint (And Why It Matters!), https://florencerevival.com/determine-if-your-walls-have-latex-or-oil-based-paint/
- How to tell if paint is oil or latex? : r/HomeImprovement - Reddit, https://www.reddit.com/r/HomeImprovement/comments/2apb7l/how_to_tell_if_paint_is_oil_or_latex/
- www.nixsensor.com, https://www.nixsensor.com/how-to-tell-if-its-oil-or-latex-paint/#:~:text=Rub%20the%20damp%20cotton%20ball,with%20any%20type%20of%20paint.
- How to know if its oil or water based paint - #1 Painting mistake - YouTube, https://www.youtube.com/watch?v=6jc4zoooO-M
- What is sugar soap and do I need to use it? - The Organic & Natural ..., https://organicnaturalpaint.co.uk/faq/what-is-sugar-soap-and-do-i-need-to-use-it/
- The Best Paint For Plaster Walls & How To Apply It - Painters World, https://paintersworld.co.uk/painters-advice/best-paint-for-plaster
- Sugar Soap? - DoItYourself.com Community Forums, https://www.doityourself.com/forum/painting-staining-all-interior-exterior-surfaces/54352-sugar-soap.html
- How to Clean Walls: The Ultimate Guide - Checkatrade, https://www.checkatrade.com/blog/how-to/clean-walls/
- Do I really need to clean my walls with something like TSP before painting? I have heard that you can simply prime instead. - Reddit, https://www.reddit.com/r/paint/comments/1f3d4uz/do_i_really_need_to_clean_my_walls_with_something/
- The Steps To Painting Over Smoke Damage On Your Walls/Ceilings, https://www.imageworkspainting.com/blog/the-steps-to-painting-over-smoke-damage-on-your-walls-ceilings
- How to Clean & Remove Smoke Soot from Walls | ServiceMaster Restore®, https://www.servicemasterrestore.com/blog/fire-damage/how-to-clean-and-remove-smoke-soot-from-walls/
- Painting over plaster | Screwfix Community Forum, https://community.screwfix.com/threads/painting-over-plaster.92708/
- Repairing Cracked Plaster - HowStuffWorks, https://home.howstuffworks.com/home-improvement/home-diy/projects/repairing-cracked-plaster.htm
- www.melanielissackinteriors.com, https://www.melanielissackinteriors.com/blog/2023/6/14/how-to-fix-a-hairline-crack-on-a-plaster-wall-so-it-doesnt-come-back#:~:text=The%20first%20part%20of%20the,that%20the%20plaster%20could%20not.
- Hairline cracks interior walls - widen or paint over? - Bunnings Workshop, https://www.workshop.bunnings.com.au/t5/Whole-of-House/Hairline-cracks-interior-walls-widen-or-paint-over/td-p/33605
- How to Fill Hairline Cracks In Plaster #shorts - YouTube, https://www.youtube.com/shorts/hgcFlUGwc2U
- How to Fix Cracks and Holes Before Painting | Benjamin Moore - YouTube, https://www.youtube.com/watch?v=y993R6pLs4E&pp=0gcJCfwAo7VqN5tD
- How to fix cracks in lath and plaster? - Home Improvement Stack Exchange, https://diy.stackexchange.com/questions/13531/how-to-fix-cracks-in-lath-and-plaster
- Holes and cracks in plaster and drywall are easily repairable. QUIKRETE® Patching Plaster in 3, https://www.quikrete.com/pdfs/projects/repairingdrywallandplaster.pdf
- What is the best way to fix broken OLD plaster in a very old house? [closed], https://diy.stackexchange.com/questions/179206/what-is-the-best-way-to-fix-broken-old-plaster-in-a-very-old-house
- Differences between joint compound, plaster, and spackle. : r/drywall - Reddit, https://www.reddit.com/r/drywall/comments/1j7bu4n/differences_between_joint_compound_plaster_and/
- Can I use drywall compound over wood lath to patch a plaster wall? - Houzz, https://www.houzz.com/discussions/4202879/can-i-use-drywall-compound-over-wood-lath-to-patch-a-plaster-wall
- PLASTER VS JOINT COMPOUND - Hensel Plastering, LLC, https://henselplastering.com/plaster-vs-joint-compound/
- Plaster vs Joint Compound what's the Difference - YouTube, https://www.youtube.com/watch?v=CoF5F9AuZ98
- How To Fix a Hole in Lath and Plaster Walls - This Old House, https://www.thisoldhouse.com/walls/21015878/how-to-patch-plaster-walls
- Sealing rough/dusty plaster? - Screwfix Community Forum, https://community.screwfix.com/threads/sealing-rough-dusty-plaster.186815/
- www.thisoldhouse.com, https://www.thisoldhouse.com/walls/21015878/how-to-patch-plaster-walls#:~:text=Vacuum%20the%20holes%20and%20spray,excess%20with%20a%20damp%20rag.
- 4 Simple Tips for Plaster Patching, https://plastermagic.com/2018/04/30/4-simple-tips-for-plaster-patching/
- How to Repair Water Damaged Ceiling Plaster - Do-it-yourself-help ..., https://www.do-it-yourself-help.com/how-to-repair-plaster-water-damage.html
- What Grit of Sandpaper Is Best for Drywall Repair? - All Painting Ltd, https://allpaintingltd.com/what-grit-of-sandpaper-best-for-drywall-repair/
- Sanding Tools: Complete Guide to a Professional Finish | Plastering ..., https://www.gypsumtools.com/blog/sanding-tools-the-complete-guide-to-a-professional-finish/
- How to Choose the Right Hand-Powered Sanding Tool - Haydn, https://haydn.co.nz/blogs/news/how-to-choose-the-right-hand-powered-sanding-tool
- Drywall Sander vs Orbital Sander: Which Do I Need? - Heamar, https://www.heamar.co.uk/blog/drywall-sander-vs-orbital-sander-which-do-i-need
- Understanding Different Sanding Grits for Drywall - Timothy's Toolbox, https://timothystoolbox.com/blogs/blog/understanding-different-sanding-grits-for-drywall
- 5 Tips for Efficiently Sanding Drywall That Decrease Dust - Woodsmith, https://www.woodsmith.com/review/sanding-drywall/
- Why Safety Gear Is Important When Sanding Drywall - Timothy's Toolbox, https://timothystoolbox.com/blogs/blog/why-safety-gear-is-important-when-sanding-drywall
- Lead-Safe Renovations for DIYers | US EPA, https://www.epa.gov/lead/lead-safe-renovations-diyers
- How to Wet-Sand Drywall to Avoid Dust - The Spruce, https://www.thespruce.com/wet-sanding-drywall-mud-1821500
- How do you contain the dust when sanding drywall patches? : r/HomeImprovement - Reddit, https://www.reddit.com/r/HomeImprovement/comments/emawla/how_do_you_contain_the_dust_when_sanding_drywall/
- Priming Plaster Walls for Perfection: A Pristine Painters Guide, https://pristinepaintersnyc.com/do-you-need-to-prime-plaster-walls-before-painting/
- Don't Make These Mist Coat Mistakes - Rawlins Paints Blog, https://www.rawlinspaints.com/blog/dont-make-these-mist-coat-mistakes/
- How to Mist Coat | Decorating Centre Online, https://www.decoratingcentreonline.co.uk/blogs/news/how-to-paint-new-plaster-what-is-mist-coating-and-is-it-important
- www.easefix.com, https://www.easefix.com/blog/mist-coat-ratio
- Help! No mist coat. | Screwfix Community Forum, https://community.screwfix.com/threads/help-no-mist-coat.213637/
- How to repair Peeling Paint on Plaster - YouTube, https://m.youtube.com/watch?v=fq5wVRyRjTE
- Best Primer for Old Plaster Walls? : r/centuryhomes - Reddit, https://www.reddit.com/r/centuryhomes/comments/1ao9vhx/best_primer_for_old_plaster_walls/
- The 3 Best Stain Blocking Primers - The Craftsman Blog, https://thecraftsmanblog.com/the-3-best-stain-blocking-primers/
- Stain Blocking Primer - The Paint Laboratory, https://www.thepaintlaboratory.com/products/stain-blocking-primer
- Best Primer For Old & New Plaster Walls - DRYLOK, https://www.drylok.com/learn/blog/what-is-the-best-primer-for-plaster-walls
- Envo Mask for Construction & Trades: N95 Respirators for Jobsite Safety, https://envomask.com/pages/construction-and-trades
- Is P100 Better Than N95? - Armbrust American, https://www.armbrustusa.com/blogs/news/is-p100-better-than-n95
- can I wear N95 instead of a construction worker's respirator? : r/HomeImprovement - Reddit, https://www.reddit.com/r/HomeImprovement/comments/ldzvbp/can_i_wear_n95_instead_of_a_construction_workers/
- What Workwear and PPE Should Be Used When Plastering and Installing Drywall?, https://drywalltoolsdirect.co.uk/blog/what-workwear-and-ppe-should-be-used-when-plastering-and-installing-drywall
- Lead safe work practices for homeowners and tenants | Department of Environmental Health, https://deh.santaclaracounty.gov/lead-safe-work-practices-homeowners-and-tenants-cloned
- How to Test for Lead Paint: 3 Types of Lead Paint Testing - Green Orchard Group, https://greenorchardgroup.com/how-to-test-for-lead-paint-3-types-of-lead-paint-testing/
- Lead Test Kits | US EPA - Environmental Protection Agency (EPA), https://www.epa.gov/lead/lead-test-kits
- Lead-Safe Renovation, Repair, and Painting - New York State Department of Health, https://www.health.ny.gov/environmental/lead/renovation_repair_painting/
- Appendix B: Renovation, Repair and Painting Projects for Do-It-Yourselfers, https://www.epa.gov/system/files/documents/2023-05/Appendix_B.pdf
- Using Trisodium Phosphate to Clean Tough Messes - This Old House, https://www.thisoldhouse.com/cleaning/22221192/trisodium-phosphate
- ZINSSER® B-I-N® SHELLAC BASE PRIMER ULTIMATE STAIN BLOCKER - Rust-Oleum, https://www.rustoleum.com/~/media/DigitalEncyclopedia/Documents/RustoleumUSA/TDS/English/CBG/Zinsser/BIN-03_B-I-N_Shellac-Base_Primer_Ultimate_Stain_Blocker_TDS_1.ashx
- Your Step-by-Step Guide to Trisodium Phosphate Cleaning Walls - The Hive Painting, https://thehivepainting.com/blog/your-step-by-step-guide-to-trisodium-phosphate-cleaning-walls